The handful of measurements that actually decide whether a seated bike fits your body and your room — seat range, capacity, resistance control and step-through — and the specs you are paying for that do not matter.
Choose a recumbent bike by fit, not features. Match the published inseam range to your own leg, buy weight capacity comfortably above your weight, favor a step-through frame, and look for fine low-end resistance rather than a big level count. Measure your doorway and floor space, and skip touchscreens and apps.
A recumbent bike is one of the kindest ways to keep moving as the knees and hips get older. You sit back in a supported seat, your feet are out in front of you, and there is no jarring and no risk of the stumble a treadmill can bring. The Arthritis Foundation notes that cycling’s smooth, continuous motion moves the joint through its range and helps produce the synovial fluid that lubricates it — which is a large part of why a seated bike suits joint-conscious exercisers so well. But all of that only pays off if the bike actually fits your body and your room. This guide is about the handful of measurements that decide that, and the expensive specs that do not.
Start with the seat and the inseam range
The seat comes first, ahead of everything else, and it is worth understanding why. On a recumbent bike the seat slides forward and back along a rail, and the distance from the seat to the pedals is what sets your knee angle at the bottom of every stroke. Set the seat too close and your knee bends too sharply as the pedal comes toward you, which a sensitive knee will not thank you for. Set it too far and you reach and lock the joint. Get the distance right and the knee travels through a comfortable arc thousands of times a session, which is exactly the gentle, lubricating motion you came for.
Because the seat matters this much, look at two things in the specs. First, how the seat adjusts. A continuous sliding rail is better than a row of pre-drilled holes, because a rail lets you land on the exact distance your leg wants rather than the nearest of a few fixed stops — and the difference between two holes can be the difference between comfortable and not. Second, the published inseam range, sometimes given as a seat-travel range or a recommended height range. Every reputable maker states the span of leg lengths a bike fits. Measure your own inseam and check it falls comfortably inside that window, not right at the edge of it. If you are short or tall, this is the spec most likely to rule a bike out — we rank the machines on the bottom of that window for short riders and on the top of it for tall riders. Our guide to setting the seat position walks through how to dial the distance in once the bike arrives, and it is worth reading before you buy so you know what to look for.
Weight capacity and the headroom rule
The next number to check is the maximum user weight, and the rule here is simple: buy comfortably above your weight, not just above it. A capacity that clears your weight by only a few pounds is a number the bike meets on paper, but the frame, the seat post, the bearings and the pedals all carry that load every session for years. A machine working near the top of its rating tends to feel less steady, wear faster, and creak sooner. Leave a real margin — a good cushion above your weight — and you get a ride that feels planted and a bike that lasts.
This matters more the heavier you are, and the good news is that movement itself is the goal, not punishment for your size. The Arthritis Foundation is clear that movement helps osteoarthritis rather than aggravating it, so the aim is a bike solid enough that you will actually get on it and keep pedaling. If you are anywhere near the top of a lighter bike’s rating, size up. We keep a shortlist of high weight capacity recumbent bikes built for exactly that headroom, so you are not left guessing which frames are genuinely sturdy.
Getting on and off, and the step-over-height problem
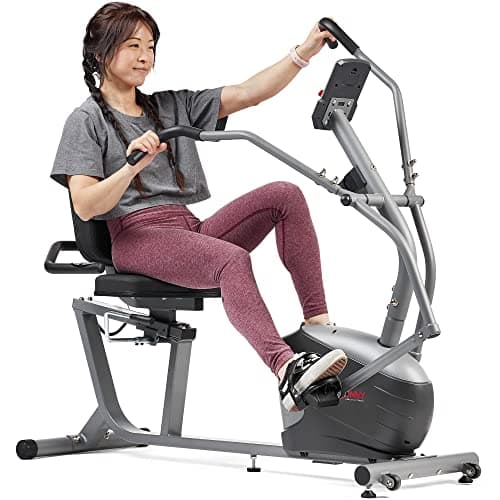
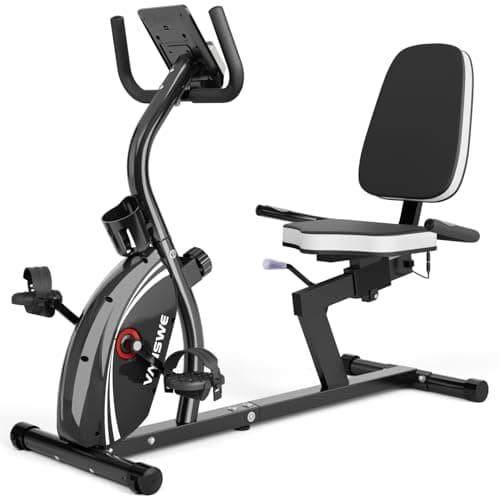
How you get on and off a recumbent bike matters as much as how it rides, because the mounting is where an older body is most likely to be caught out. The frame style is the thing to look at. A step-through frame — where the section between the seat and the pedals is open and low — lets you walk in and sit down without lifting your leg high or swinging it over anything. A frame with a crossbar or a high central spine makes you clear an obstacle to get seated, and that is exactly the movement a stiff hip or a replaced knee finds hardest. For most 60-plus buyers, a step-through design is the safer, easier choice, and it is worth prioritizing.
Here is the honest part, and it is a finding this site will not paper over: no manufacturer publishes a “step-over height” for recumbent bikes. There is simply no standard spec for how high you have to lift your foot to get onto the machine, so nobody prints one, and any listing that claims to quote it is guessing. Our method is to work with what actually is published — seat height where it is stated, the inseam range, the frame style, whether it is step-through — and then to measure the step-over yourself, either on the real machine in a store or from a clear side-on photo with a known dimension to scale against. Do not trust a number nobody prints. Our explainer on step-over height shows you exactly how to take that measurement so the mounting holds no surprises on delivery day.
Resistance control: granularity beats the level count
Resistance is where the marketing and the reality drift apart. Boxes love to advertise the number of resistance levels, as though more is plainly better. For a sensitive knee, what matters far more than the count is the granularity at the low end — how small and how gentle the steps are between the easiest settings, and how truly easy the lowest setting is. A bike with a modest number of closely spaced levels that start genuinely light will serve gentle, joint-conscious work better than one boasting a bigger number whose first level is already a firm push.
The reason is comfort and consistency. Some days a knee wants a hair less effort than yesterday, and a bike with fine low-end steps lets you find that setting instead of being forced to choose between too easy and too much. Magnetic resistance, which most current recumbent bikes use, tends to give smoother, quieter, more even control than older friction systems, and that evenness is worth having. (Quieter is a mechanism, not a measurement — no maker publishes a decibel figure, and our shortlist of quiet bikes for apartments ranks on what they do publish instead.) When you compare bikes, ignore the headline level count and ask instead: how low does it start, and how finely can I nudge it? That is the spec that decides whether you can keep the effort in the comfortable, sustainable range the CDC has in mind when it recommends at least 150 minutes a week of moderate-intensity activity for adults 65 and over. Moderate is a level you can actually hold, and fine resistance is how you hold it.
Footprint, clearance, and moving it later
A bike that will not fit your room or your doorway is a return, no matter how well it rides, so measure before you buy. Three numbers matter. The first is the footprint plus clearance: the length and width of the bike itself, and the extra space you need around it to get on and off comfortably and to sit with your legs out front. The second is the delivery path — walk the route from your front door to where the bike will live and note the narrowest point, because assembled recumbent bikes rarely fit through an interior doorway, which means it is the carton that has to pass. Check the box dimensions against your tightest doorway before you order.
The third consideration is whether you can move it after it is built. Recumbent bikes are heavy, and a good one is heavier still. If you will ever need to shift it — to clean, to store, to change rooms — look for built-in transport wheels at one end so you can tip and roll it rather than lift it. Think, too, about where it will sit day to day. A bike parked somewhere pleasant and convenient is a bike you use; one wedged into an awkward corner quietly becomes a clothes rack. Fit the machine to a spot you will happily return to, because the whole point is that you keep coming back.
What you overpay for and can safely ignore
Finally, the money. A lot of what pushes a recumbent bike’s price up does nothing for whether it fits your body or moves your knee comfortably, and it is worth knowing what to leave on the shelf. Big color touchscreens are the clearest example — they look impressive in photos, add cost, and change nothing about the ride. App subscriptions are another: a monthly fee for classes or virtual routes is fine if you genuinely want it, but it is not part of the exercise and a plain console pedals exactly as well. Sky-high resistance-level counts, as we have said, are a number, not a benefit past the point where the steps are already fine and low. And a familiar brand name often carries a premium that the components underneath do not justify.
Spend the money where it earns its keep instead: on a seat that fits your inseam and slides on a real rail, on weight capacity with genuine headroom, on a step-through frame, and on honest build quality you can feel in a steady, quiet ride. Those are the things that decide whether you will actually use the bike for years, which is what turns it from a purchase into a habit. When you are ready to see specific machines chosen against exactly these criteria, our shortlist of the best recumbent bikes for seniors is the place to start, and if budget is the deciding factor, the best budget recumbent bikes get you the fit that matters without the features that do not.
Choosing well comes down to fit, not features. Match the published inseam range to your own leg, give the weight capacity real headroom, favor a step-through frame and measure the step-over yourself, look for fine low-end resistance, and check that the bike and its box fit your room and your doorway. Do those and the marketing extras stop mattering. The right recumbent bike is the one you will get on tomorrow and the day after, keeping the joints moving gently through their range for years — and, as ever, talk to your doctor or physical therapist before you start something new, especially if a joint is sore or you are recovering from surgery.
General information, not medical advice. Tread & Tone is written by an enthusiast, not a clinician. Nobody here is a doctor, a physical therapist or a trainer, and nothing on this site has been medically reviewed. Talk to your doctor or physical therapist before starting something new, particularly after surgery, a fall, or a change in medication.
Questions people ask
What is the single most important thing to check on a recumbent bike?+
The seat — specifically how far it slides and the inseam range the maker publishes for it. Seat distance sets your knee angle at the bottom of every pedal stroke, and getting that right is what keeps a sensitive knee comfortable. A bike can have every other feature you want, but if its seat range does not cover your leg length, it is the wrong bike for you. Check the published inseam window against your own measured inseam before you look at anything else.
How much weight capacity do I actually need?+
Buy comfortably above your weight, not just above it. A capacity that sits only a few pounds over what you weigh is a number the bike meets on paper but works hard to hold, and the frame, seat and bearings will feel it over years of use. Leaving real headroom — a good margin above your weight — buys you a steadier, quieter ride and a machine that lasts. If you are near the top of a lighter bike’s rating, size up to a sturdier one.
Why can I not find the step-over height listed anywhere?+
Because manufacturers do not publish it. There is no standard spec for how high you have to lift your leg to get onto a recumbent bike, so no maker prints one. That is an honest gap, and the fix is simple: work from what they do publish — seat height when it is listed, frame style, whether it is step-through — and then measure the step-over yourself on the actual machine or from clear side-on photos. Do not trust a number nobody prints.
Are more resistance levels better?+
Not really, past a point. What matters for a sensitive knee is fine granularity at the low end — small, gentle steps between the easiest settings — not the total count. A bike with sixteen levels that are all closely spaced and start truly easy is better for gentle work than one advertising a bigger number whose lowest setting is already firm. Look at how low and how finely the resistance starts, not how high it goes.
How do I know a recumbent bike will fit in my room?+
Measure three things and write them down: the bike’s footprint plus the clearance you need to get on and off, the path from your door to where it will live, and the box dimensions against your narrowest doorway. Assembled bikes rarely fit through a door, so it is the carton that has to pass. Also check the weight and whether it has transport wheels if you will ever need to move it. A bike that will not fit the room or the doorway is a return, however good it is otherwise.
What features are safe to skip to save money?+
Big touchscreens, app subscriptions, sky-high resistance-level counts, and brand-name premiums are the usual places you overpay. None of them changes whether the bike fits your body or moves your knee comfortably through its range. A plain console, well-spaced low resistance, a seat that fits your inseam and honest build quality do the real work. Spend on fit and sturdiness; skip the screen and the monthly fee.
CDC — Older Adult Activity: An Overview — At least 150 minutes a week of moderate-intensity activity, 2 days of muscle strengthening, plus balance activities for adults 65 and over (read July 24, 2026)
Step-through bikes around $300 and under that still publish a real weight capacity and seat range — ranked on value, with the one we tell you to skip even at this price.
The seat distance decides whether the bike helps your knees or hurts them, more than the machine does. How to set it in two minutes, and the leg angle to aim for.